Samosa: Okay, gather ’round, snack warriors! If you’re looking for the perfect finger food that screams “I put in effort” but actually takes way less time than people think, we need to talk about samosas. These golden, crispy, triangular pockets of pure joy are about to become your secret weapon for impressing guests at literally any gathering.
Whether you’re hosting a party, bringing food to a potluck, or just want something ridiculously delicious to munch on while binge-watching your favourite show, samosas are going to rock your world. And here’s the best part – they’re SO much easier to make at home than you probably think!
Wait, What Exactly Are Samosas?
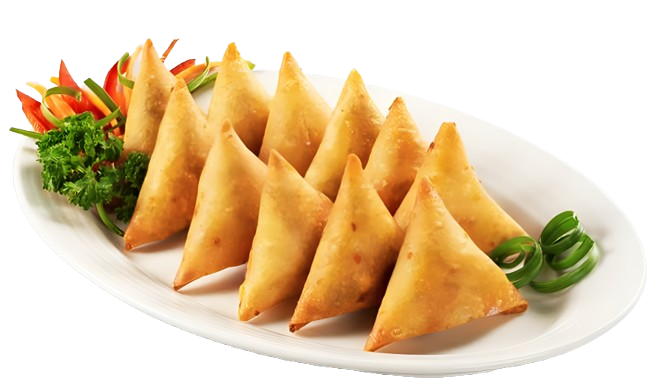
Think of samosas as the universe’s perfect finger food. They’re crispy, golden pastry triangles filled with a fragrant, spiced potato and pea mixture that’s absolutely addictive. One bite and you’ll understand why these bad boys have conquered the world from South Asia to the Middle East and everywhere in between.
They’re crispy on the outside, fluffy on the inside, packed with flavour, and they’re the kind of snack that makes people ask “Did you really make these?” with that tone of voice that means they’re genuinely impressed. Yes, you did. Yes, you’re amazing.
Why Samosas Are the MVP of Finger Foods
Let’s be real – samosas are basically perfect snacking design:
- Handheld perfection – No plates, no mess, just grab and enjoy
- Crispy-crunchy exterior – That satisfying crunch when you bite in
- Warm, flavourful filling – A flavour explosion in every bite
- Make-ahead friendly – Prep them hours ahead, fry when guests arrive
- Impressive as hell – Homemade samosas make you look like a culinary genius
- Budget-friendly – Seriously, these cost pennies to make
- Crowd-pleaser – Vegetarian, easy to customise, everyone loves them
What You’ll Need (The Golden Lineup!)
Your Star Ingredients for the Filling:
- 3 large potatoes (waxy potatoes work best – they hold together better)
- 1 cup frozen peas (or fresh if you’ve got them)
- 1 onion (finely diced)
- 2 teaspoons cumin seeds (or ground cumin if that’s what you have)
- 1 teaspoon coriander (ground is fine)
- ½ teaspoon turmeric
- ½ teaspoon chilli powder (adjust to your heat preference!)
- 2 tablespoons fresh coriander (cilantro – chopped)
- 2 tablespoons fresh ginger (minced – so good!)
- 2 garlic cloves (minced)
- Salt and pepper (to taste)
- 1 tablespoon oil (for cooking the filling)
For the Wrapper:
- 2 cups all-purpose flour
- ½ teaspoon salt
- 2 tablespoons oil
- ½ cup warm water (approximately – you might need a bit more or less)
The Frying Situation:
- Oil for deep frying (vegetable oil or any neutral oil works)
- A deep pot or wok (for frying)
Optional But Awesome Additions:
- Green chillies (finely chopped, for extra heat)
- Amchur powder (dried mango powder – adds a subtle tang)
- Nigella seeds (kalonji – sprinkle on top before frying)
Let’s Make These Bad Boys!
Step 1: The Filling Foundation (20 minutes)
First up, let’s make the filling because it’s honestly where the magic happens.
Boil your potatoes until they’re soft but not falling apart. Drain them, let them cool slightly, then peel and cut into small cubes. You want them bite-sized – not mushy, not chunky, but perfect little pieces.
Heat a tablespoon of oil in a pan and add your cumin seeds. Listen for that little crackling sound – that’s the sign they’re releasing their flavour! Add your diced onion and cook until it’s soft and golden (about 5 minutes). This is where the base flavour of your samosa is being created, so don’t skip this.
Add your minced ginger and garlic, then stir in your coriander, turmeric, and chilli powder. Cook for just a minute until it’s fragrant. Then add your diced potatoes and peas, stirring everything together. Add your fresh coriander, season with salt and pepper, and taste it. Adjust the spices to your liking – this is YOUR samosa, make it perfect for you!
Cook everything together for a couple of minutes, then take it off the heat and let it cool. You want it completely cool before you start wrapping, trust me on this. Hot filling makes wet wrappers, and wet wrappers are the enemy of crispy samosas.
Step 2: The Dough Magic (15 minutes of kneading)
Here’s where a lot of people get intimidated, but seriously – this dough is easier than you think.
Mix your flour and salt in a bowl. Add your oil and mix it with your fingers until it looks like breadcrumbs. Then gradually add warm water while mixing, until you have a soft dough. It should be slightly softer than bread dough but not sticky.
Knead it for about 5-10 minutes until it’s smooth and elastic. If it’s too sticky, add a tiny bit more flour. If it’s too dry, add a tiny bit more water. You’re looking for that goldilocks zone – not too much, not too little, juuust right.
Once your dough is perfect, cover it with a damp cloth and let it rest for 15-30 minutes. This resting time is crucial – it makes the dough easier to work with and helps create those flaky layers.
Step 3: The Assembly Line (This is where it gets fun!)
Divide your dough into 8-12 equal balls (the more balls, the smaller your samosas will be). Take one ball and roll it flat into a thin circle, about the thickness of a crepe. Don’t worry if it’s not perfectly circular – samosas are forgiving like that.
Cut your circle in half with a sharp knife. Pick up one semi-circle and roll it into a cone shape – overlap the cut edges slightly and seal them by wetting your finger and pressing along the seam. This is easier than it sounds, I promise!
Hold your cone in one hand and fill it with about a tablespoon of your cooled filling. Don’t overfill – this is key! Wet the open edge of the cone and seal it shut by pressing firmly. You now have a beautiful triangular samosa! Do a little victory dance.
Repeat with the rest of your dough and filling. You can arrange them on a plate as you go.
Step 4: The Frying Spectacular (The moment of truth!)
Heat your oil to about 350°F (175°C). If you don’t have a thermometer, drop a tiny piece of dough in – if it sizzles and floats to the surface, you’re good to go.
Carefully place your samosas into the hot oil, a few at a time (don’t crowd the pan!). Fry them for about 2-3 minutes on each side until they’re golden brown and crispy. You want them to be a gorgeous golden colour, not dark brown.
Use a slotted spoon to flip them halfway through cooking and to fish them out when they’re done. Drain them on paper towels.
Pro tip: Don’t eat them immediately when they come out of the oil – they’re EXTREMELY hot inside. Wait a few minutes, or you’ll burn your mouth like I did the first time I made these. Learn from my pain!
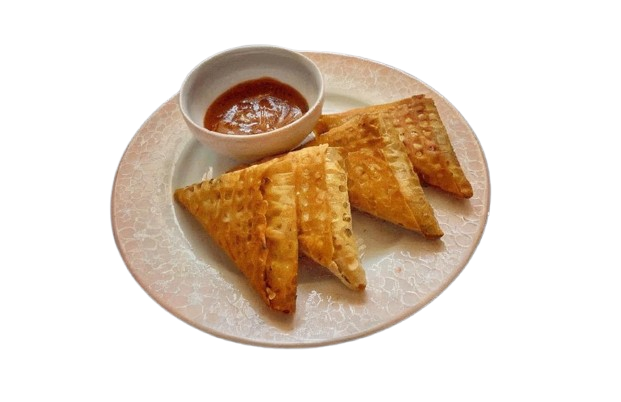
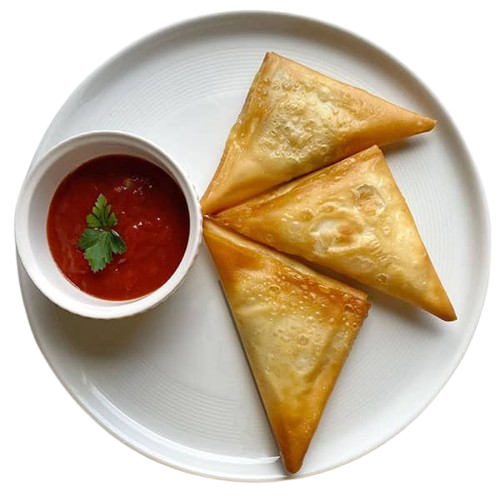
Step 5: The Serving Triumph!
Arrange your beautiful golden samosas on a platter and serve with:
- Tamarind chutney (sweet and tangy perfection)
- Mint chutney (cooling and refreshing)
- Mango chutney (sweet with a kick)
- Yogurt dip (for when you want something cooling)
- Sweet chilli sauce (because why not?)
Watch your guests’ faces light up. Bask in the glory of being the person who made these from scratch!
Pro Tips That’ll Make You a Samosa Legend
Cold filling is crucial – Seriously, make your filling ahead of time and refrigerate it. Hot filling will make your dough soggy and your samosas sad.
Don’t overfill – I know you want to, but resist! A tablespoon is the sweet spot. Too much filling and your samosa will burst open while frying (not ideal).
Oil temperature matters – Too hot and your samosas will burn on the outside while the filling stays cold. Too cold and they’ll be oily and soggy. Medium heat is your friend.
Make them ahead – You can assemble samosas hours ahead of time. Keep them in the fridge on a covered plate. Fry them fresh just before serving – this is the key to impressing people.
Freeze them – Made too many? Layer them between parchment paper in a freezer container. They’ll keep for months! Fry straight from frozen, just add a minute or two to cooking time.
Experiment with fillings – Once you nail the potato and pea filling, try: lentil filling, meat filling, paneer and potato, even a sweet version with coconut and jaggery. The possibilities are endless!
Don’t skip the spices – This is what separates “okay” samosas from “holy wow” samosas. Toast your spices, use fresh ginger and garlic – it makes ALL the difference.
Why You Need to Make These This Week

Samosas are the kind of snack that changes your party game forever. They’re:
- Genuinely impressive – Your guests will think you’re a culinary wizard
- Actually, not complicated – Once you make them once, you’ll be making them for every gathering
- Perfect for any occasion – Fancy party? Yes. Casual hangout? Also yes. Random Tuesday? Absolutely yes.
- Incredibly satisfying – There’s something about eating something you made from scratch that just hits different
- A conversation starter – “Did you make these?” “Yes, yes I did” takes a bow
The Ultimate Payoff
Making samosas at home is one of those cooking victories that feels so much bigger than it actually is. You walked into your kitchen with flour, potatoes, and spices. You walked out with golden, crispy masterpieces that taste better than anything you could buy.
The sizzle of them frying, the golden colour as they come out of the oil, the aroma that fills your kitchen, the moment someone takes their first bite and their eyes light up – this is what cooking is all about.
Plus, you now have a snack that you can make ahead, freeze, and deploy whenever you need to look impressive. You’re basically a snack superhero now.
So grab some potatoes, fire up that oil, and get ready to be the star of your next gathering. Your samosa journey starts now!
Now get out there and make some crispy, golden perfection happen!